
A quiet, efficient drivetrain starts with a well-maintained bicycle chain.
Keeping your chain clean, properly lubricated, and checked for wear not only makes pedaling smoother—it also protects expensive components like cassettes and chainrings.
Modern maintenance best practices show that a clean chain reduces friction, shifts better, and lasts longer, improving overall ride performance.
Why Chain Care Matters
- Performance: Contaminants (dust, sand, road grit) increase friction and reduce efficiency; cleaning and correct chain lube restore smooth operation.
- Longevity: Routine maintenance delays cassette/chainring wear and keeps replacement costs down.
- Power Savings: Lab tests demonstrate that “dirty vs. clean” can cost several watts—enough to feel on climbs and during hard efforts.
- Modern Wins: Waxed or well-prepped chains can save 2–8 watts while dramatically reducing contamination and long-term running costs.
The Three Pillars of Chain Care
- Cleaning – Remove grime so lube can reach the rollers and pins.
- Lubrication – Match lube type (wet/dry/wax) to conditions and apply correctly.
- Wear Monitoring – Replace the chain before it damages the rest of your drivetrain.
How Often Should You Clean and Lube?
Frequency depends on terrain, weather, and lube type. As a starting framework:
- Road (fair weather): Clean and relube roughly every ride or ≤250 km, at minimum monthly.
- MTB / wet, gritty conditions: Clean and relube every ~100 km (often after muddy rides).
- Waxed chains: Intervals can be longer between re-applications when prep is done correctly; users report fewer contaminants and extended component life.
Pro tip: If the chain sounds dry, looks matte/dirty, or leaves black residue on a finger swipe, it’s time to clean and lube.
Tools & Supplies Checklist
- Degreaser: Bike-specific or mild (avoid harsh solvents near bearings).
- Chain cleaning device or brushes + rags.
- Purpose-made chain lube (wet, dry, or wax-based).
- Chain wear gauge (e.g., CC-3.2/CC-4).
- Gloves to keep hands clean.
- Optional: Quick-link pliers, spare quick-link, stand, low-pressure water source.
Step-by-Step: Deep Clean (On-Bike)
- Prep the area. Shift to the small chainring and middle cog for slack.
- Brush off debris. Knock off loose dirt from chain, jockey wheels, and rings.
- Degrease the chain. Use a chain bath tool or brush. Rotate the cranks backward to pull degreaser through the rollers.
- Detail the drivetrain. Scrub jockey wheels and chainrings; gunked pulleys accelerate wear and noise.
- Rinse lightly. Low pressure only; avoid blasting water at bottom bracket, hubs, or pivots.
- Dry thoroughly. Spin the chain and wipe with a clean lint-free rag until it’s dry and squeak-free.
- Lube correctly (details below), then wipe off excess on the outside plates—lubricant belongs inside the rollers, not smeared over the exterior where it attracts dirt.
Quick refresh between deep cleans: Wipe the chain with a clean rag after rides, then apply a small top-up of the right lubricant.
Choosing the Right Lubricant
Different chain lubes excel in different conditions:
- Wet lubes: Thick, water-resistant, best for rain and long wet rides; attract more dirt, so clean more often.
- Dry lubes: Thinner carriers with a light solid lubricant residue; stay cleaner in dry dust but wash off quickly in rain.
- Wax systems (hot-melt or drip wax): Very clean running and low friction when the chain is thoroughly cleaned first; longer component life and measurable watt savings.
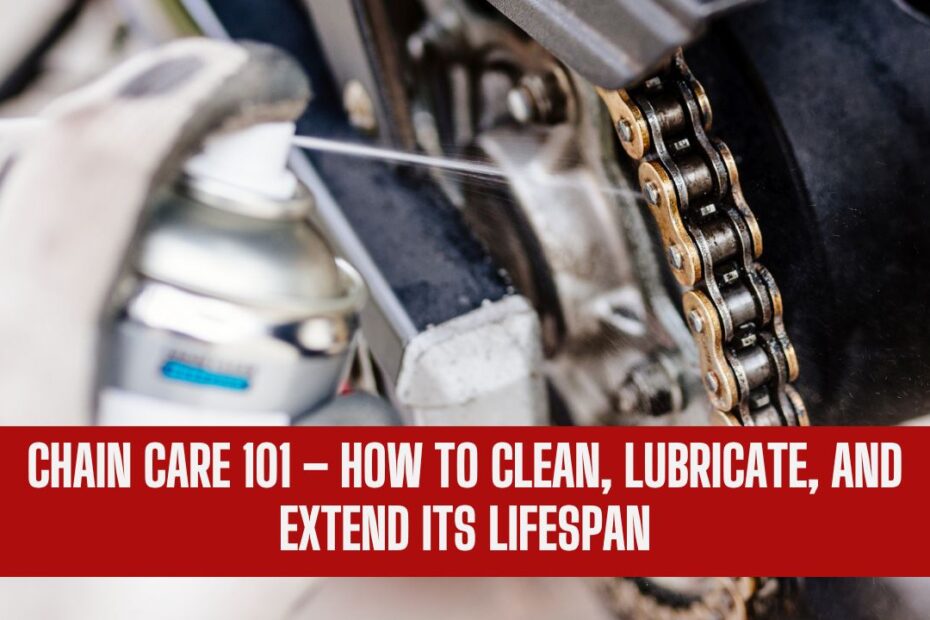
How to Apply Lube the Right Way
- Start with a clean, dry chain.
- Drip one small drop on each roller while back-pedaling slowly.
- Work it in. Continue rotating for 20–30 seconds so lube penetrates pins/rollers.
- Wipe off excess from the side plates to prevent grit buildup.
- Set time: Let the chain sit (ideally overnight for some wax/drip products) so carriers evaporate and the lubricant bonds internally.
Chain Wear: When to Replace (and Why It Matters)
Chains “stretch” as pins and rollers wear. Replacing at the right time prevents accelerated wear of cassettes and chainrings.
- 11–12-speed: Replace at or before 0.5% wear.
- 5–10-speed: Replace at or before 0.75% wear.
- Use a chain checker to measure elongation accurately.
Ignoring wear until 1.0% can turn a simple chain swap into a full drivetrain replacement.
Speedy, Everyday Routine (5–7 Minutes)
- Wipe the chain with a clean rag after rides.
- Spot-clean jockey wheels/chainrings if visible buildup.
- Relube with the correct product for conditions.
- Check wear weekly during heavy mileage blocks.
Advanced Care: Waxing & Deep Decontamination
Enthusiasts seeking maximum efficiency and cleanliness are turning to wax systems:
- Benefits: Lower friction, cleaner drivetrains, longer component life, and multi-watt savings vs. conventional oil lubes.
- Approaches:
- Hot-melt waxing: Remove the impeccably cleaned chain and submerge in melted wax pellets; refit once cooled.
- Drip wax: Easier to apply; best results after a one-time “strip to bare metal” prep.
Racing or riding in harsh conditions? A waxed chain can be one of the most cost-effective performance upgrades available.
Common Mistakes to Avoid
- Over-lubing: Excess oil on outer plates attracts dirt and grinds away components. Wipe thoroughly after application.
- Skipping cleaning in the wet: Rain turns road grit into grinding paste—clean promptly after wet rides.
- Riding past wear limits: This accelerates cassette/ring wear and increases maintenance costs. Measure & replace on time.
- Spraying degreaser near bearings: Use controlled application and avoid high-pressure water to protect seals.
Quick Reference
Lube Types vs. Conditions
| Lube Type | Best For | Pros | Cons | Notes |
|---|---|---|---|---|
| Wet lube | Rain, long wet rides | Durable film, resists wash-off | Attracts dirt; needs more cleaning | Great for monsoon season / winter. |
| Dry lube | Dry roads, dusty trails | Cleaner look, less surface grime | Washes off in rain; shorter life | Reapply sooner after wet rides. |
| Wax (hot-melt/drip) | All-weather when prepped right | Very clean, low friction, longer component life | Initial prep time; some curing time | Can save 2–8 W and reduce costs. |
Maintenance Interval Starters
| Riding Context | Clean + Relube |
|---|---|
| Road (fair weather) | After each ride or ≤250 km; at least monthly |
| MTB / Wet / Gritty | About every 100 km; often after muddy rides |
| Waxed Chain | Longer intervals; monitor noise/feel; re-wax per system guidance |
Chain Wear Thresholds
| Drivetrain Speed | Replace Chain At |
|---|---|
| 11–12-speed | 0.5% wear (or sooner) |
| 5–10-speed | 0.75% wear (or sooner) |
Shimano-Backed Application Pointers (That Most Riders Miss)
- Aim lube at the rollers, not the cassette or pulley wheels.
- Keep derailleur pulleys free of gunk—sharp, pointy teeth can mean it’s time to replace them.
- A clean chain is a fast chain—simple tools and a routine go a long way.
Troubleshooting Quick Guide
- Noisy after lubing? You may have applied too little or wiped too aggressively; re-apply minimally to the rollers.
- Black paste on chain? Over-lubing or infrequent cleaning—reset with a deep clean and start fresh.
- Skipping under load? Could be wear mismatch (new chain on worn cassette) or cable tension; check wear and indexing.
Keeping your chain in top form is straightforward: clean it regularly, lubricate with the right product for your conditions, and monitor wear with a simple gauge.
These habits unlock a quieter ride, smoother shifting, longer-lasting components, and even measurable power savings.
Build a repeatable routine, choose the lube that matches your terrain and weather, and replace the chain at the recommended wear points.
Your legs, wallet, and drivetrain will thank you.
Frequently Asked Questions
Over-lubrication. Excess oil on the outer plates attracts abrasive grit that accelerates wear.
Apply small drops to each roller, let it penetrate, then wipe off the excess thoroughly.